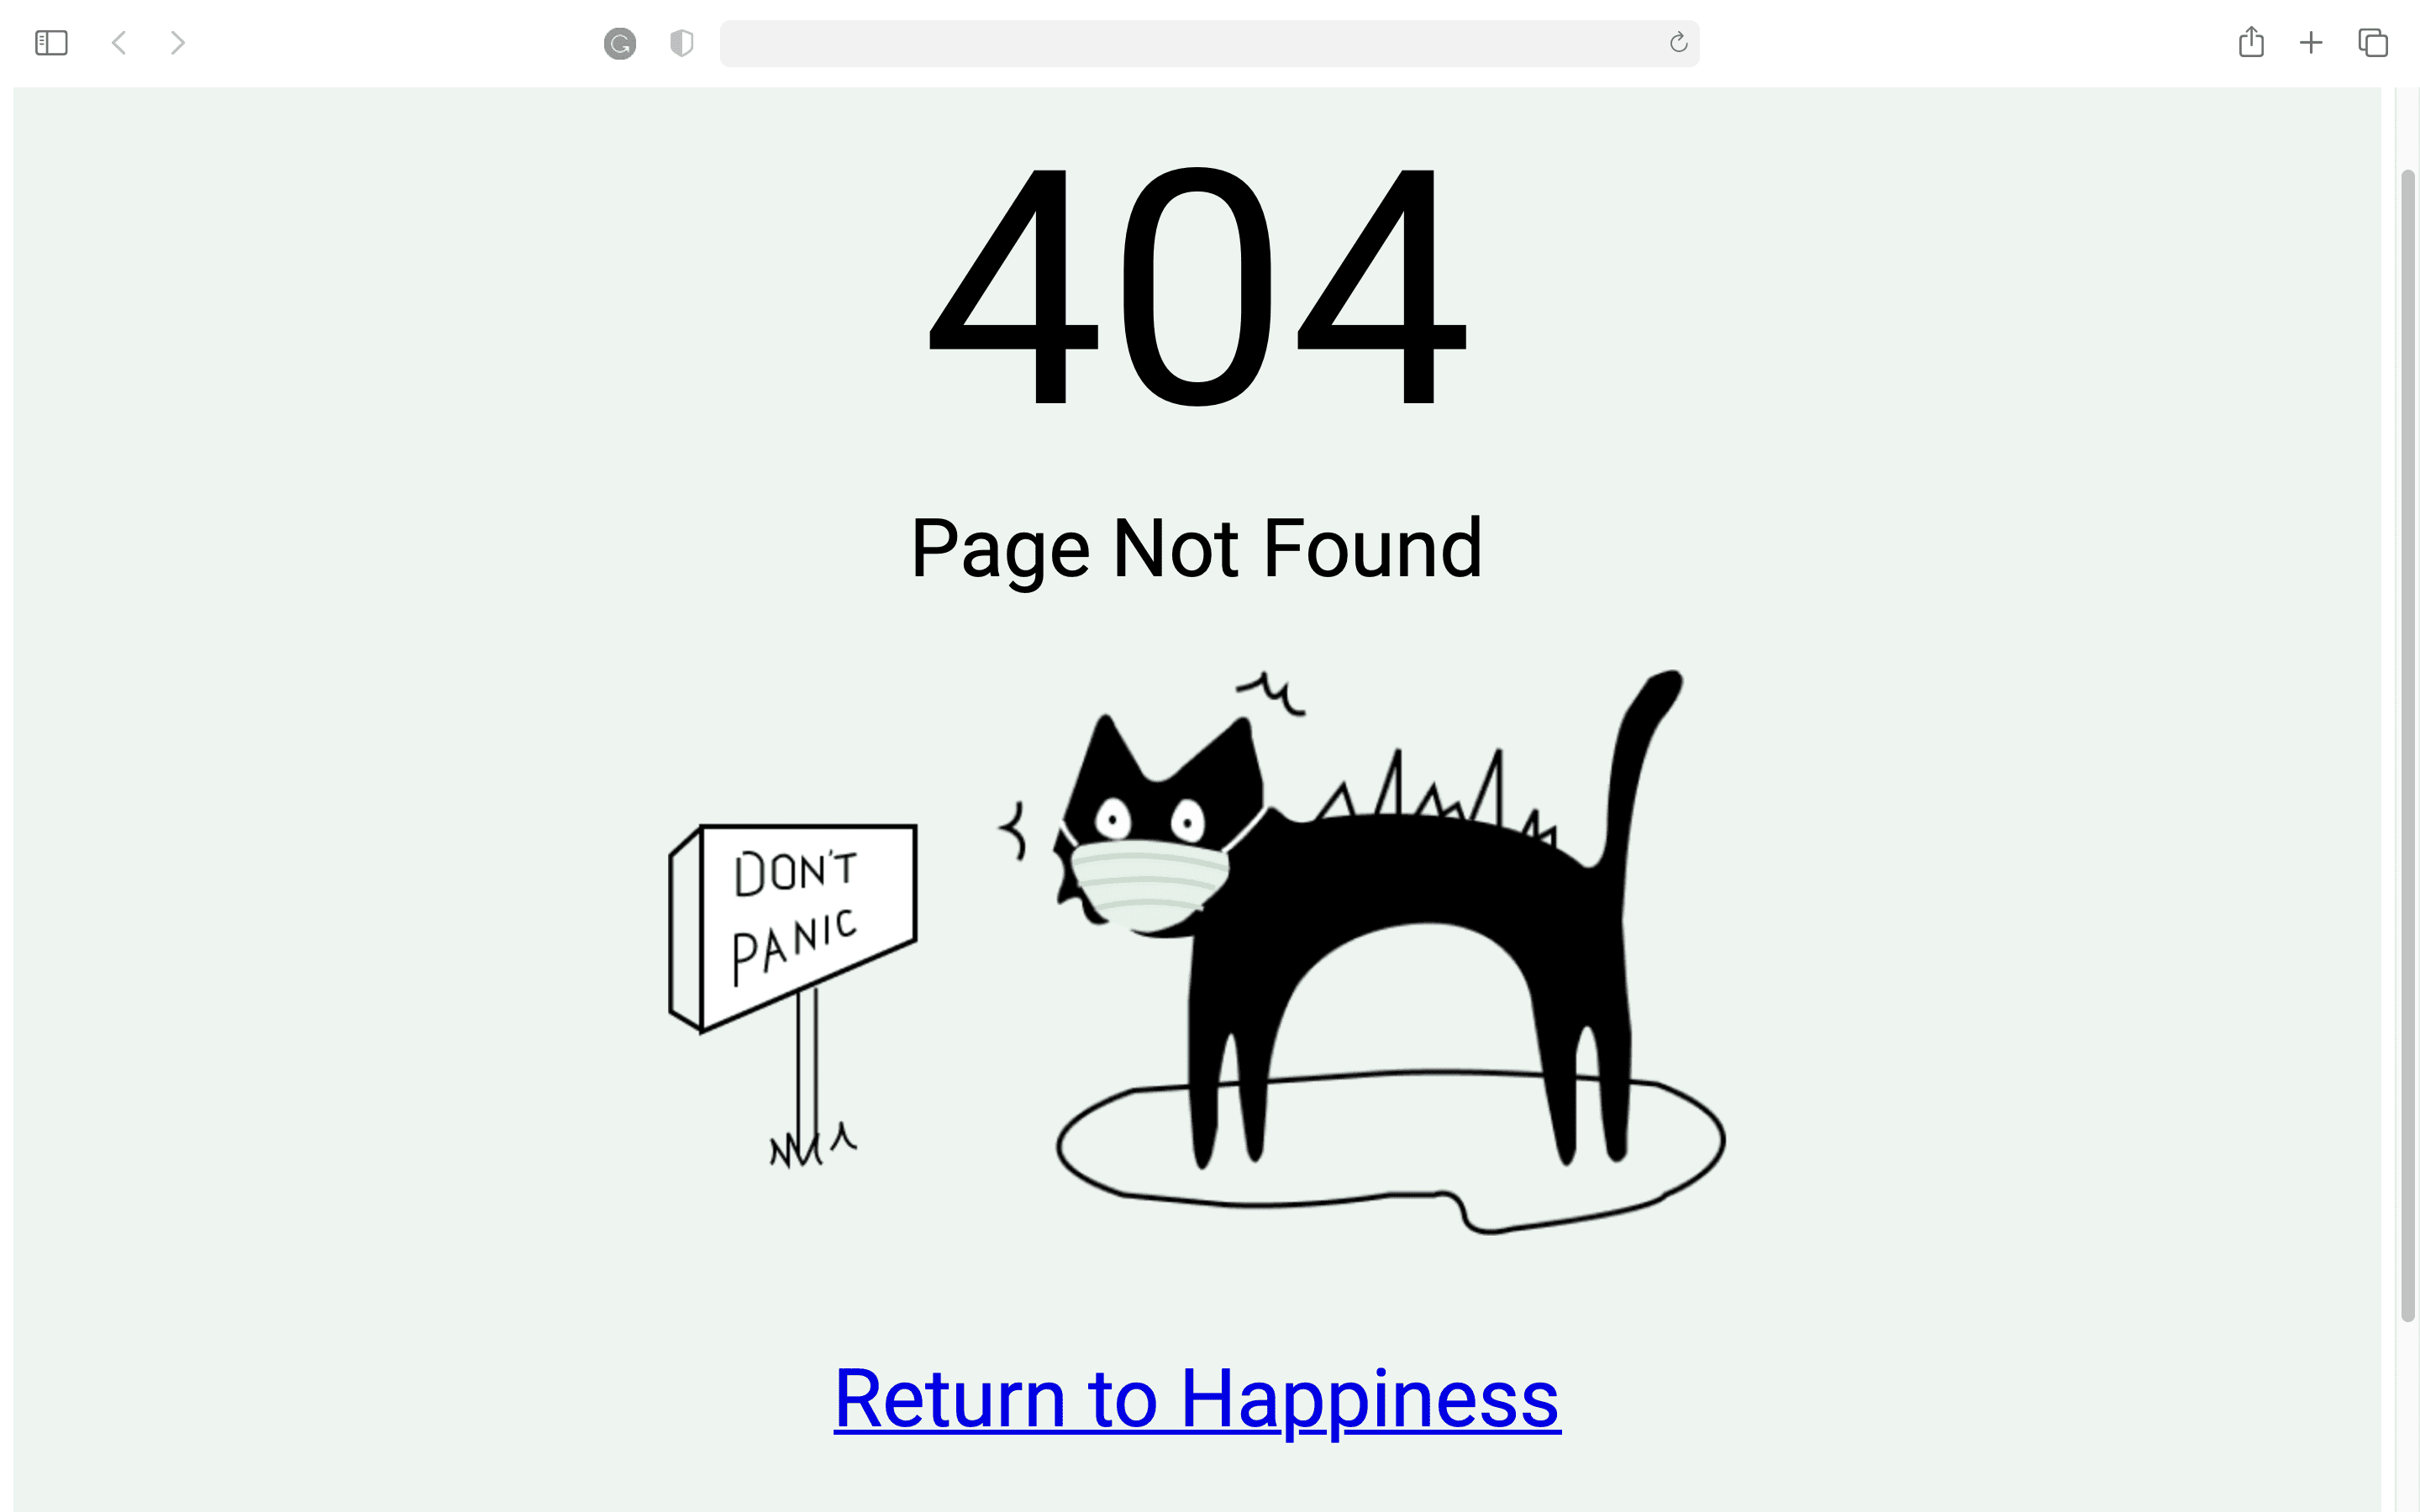
A 404 not found error occurs when the visitor requests a non-existent URL within your website. The following guide will help you create a custom 404 error page, just as shown below.
Step 1: Log in to cPanel
http://example.com/cpanel
Here, example.com represents your domain name. You should enter the cPanel username and password to get into the cPanel.
If your website is hosted with Veeble, you can access cPanel easily through Veeble client zone.
Login to Veeble Client Area >> select Services >> on Dashboard, locate your hosting package >>click Login to cPanel option
Step 2: Select File Manager, in the files section.
The image below depicts the same.

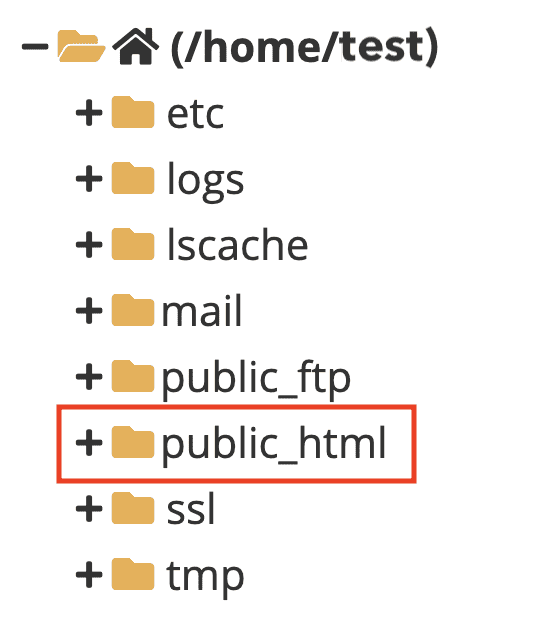
Step 3: On the left sidebar, navigate to the public_html folder
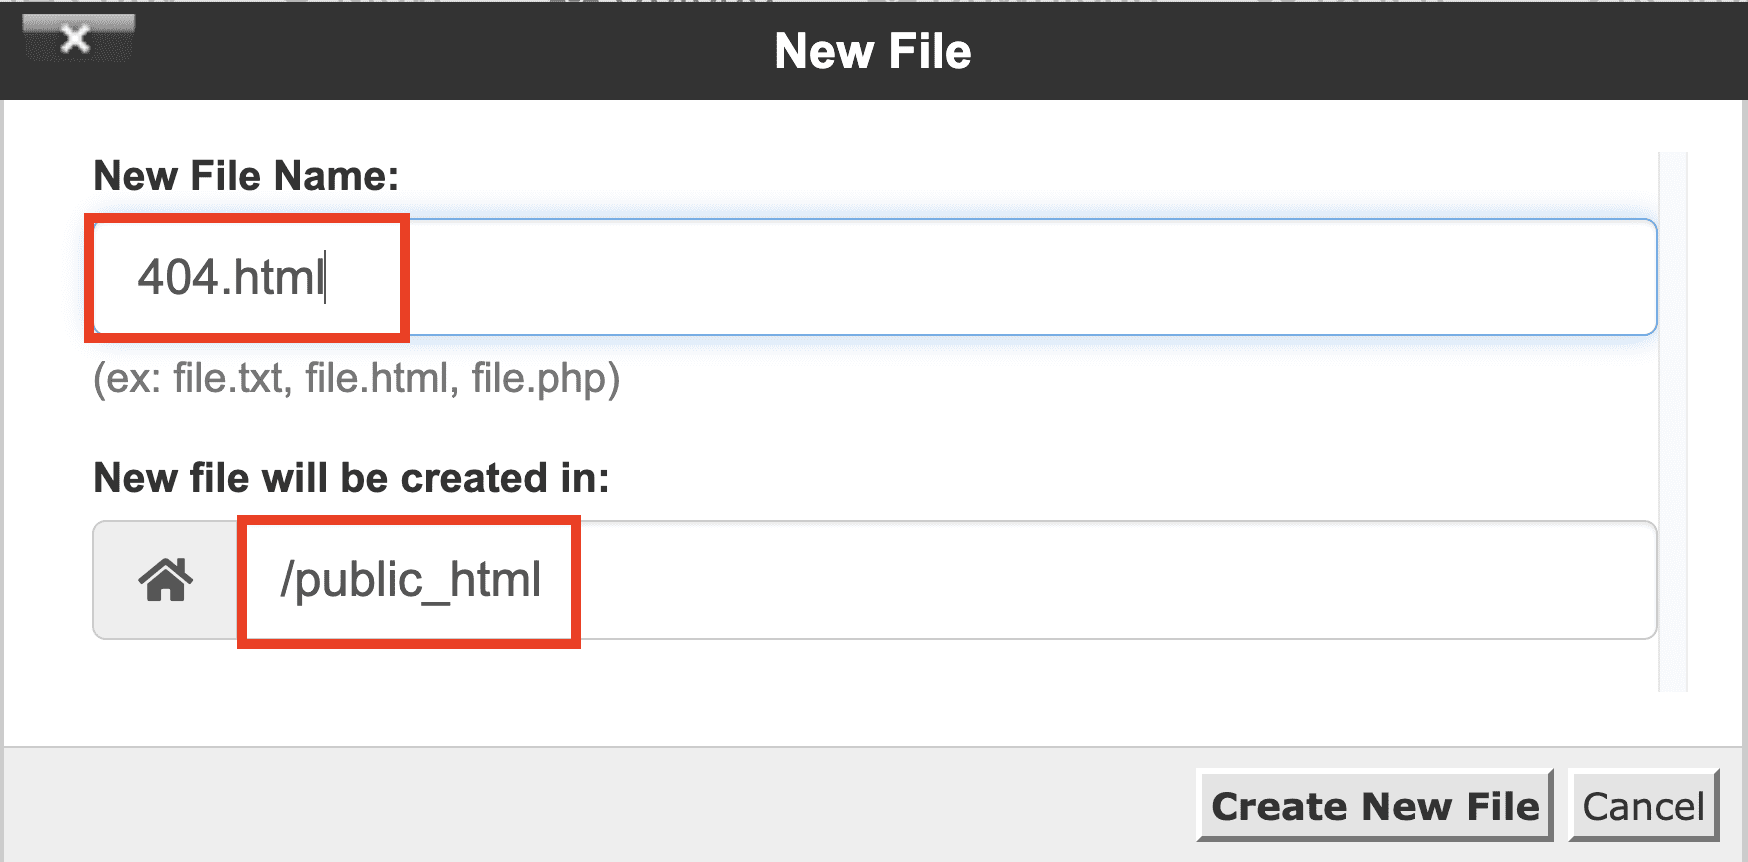
Step 4: Create a file named 404.html
Click on +File on the top left corner of the dashboard. Create a new file with the name “404.html”.
Step 5: Copy the HTML code to the file 404.html
Edit the file 404.html, copy and paste the following HTML code inside it, and after that, save it.
<!DOCTYPE html>
<html>
<head>
<link href=”https://fonts.googleapis.com/css?family=Roboto&display=swap” rel=”stylesheet” />
<link href=”./css/main.css” rel=”stylesheet” />
<title>Document</title>
</head>
<body>
<div class=”v0_3″>
<span class=”v4_4″>404</span>
<span class=”v4_5″>Page Not Found</span>
<div class=”v9_3″></div>
<div class=”v7_7″><a href=”/”>Return to Happiness</a></div>
</div>
</body>
</html>
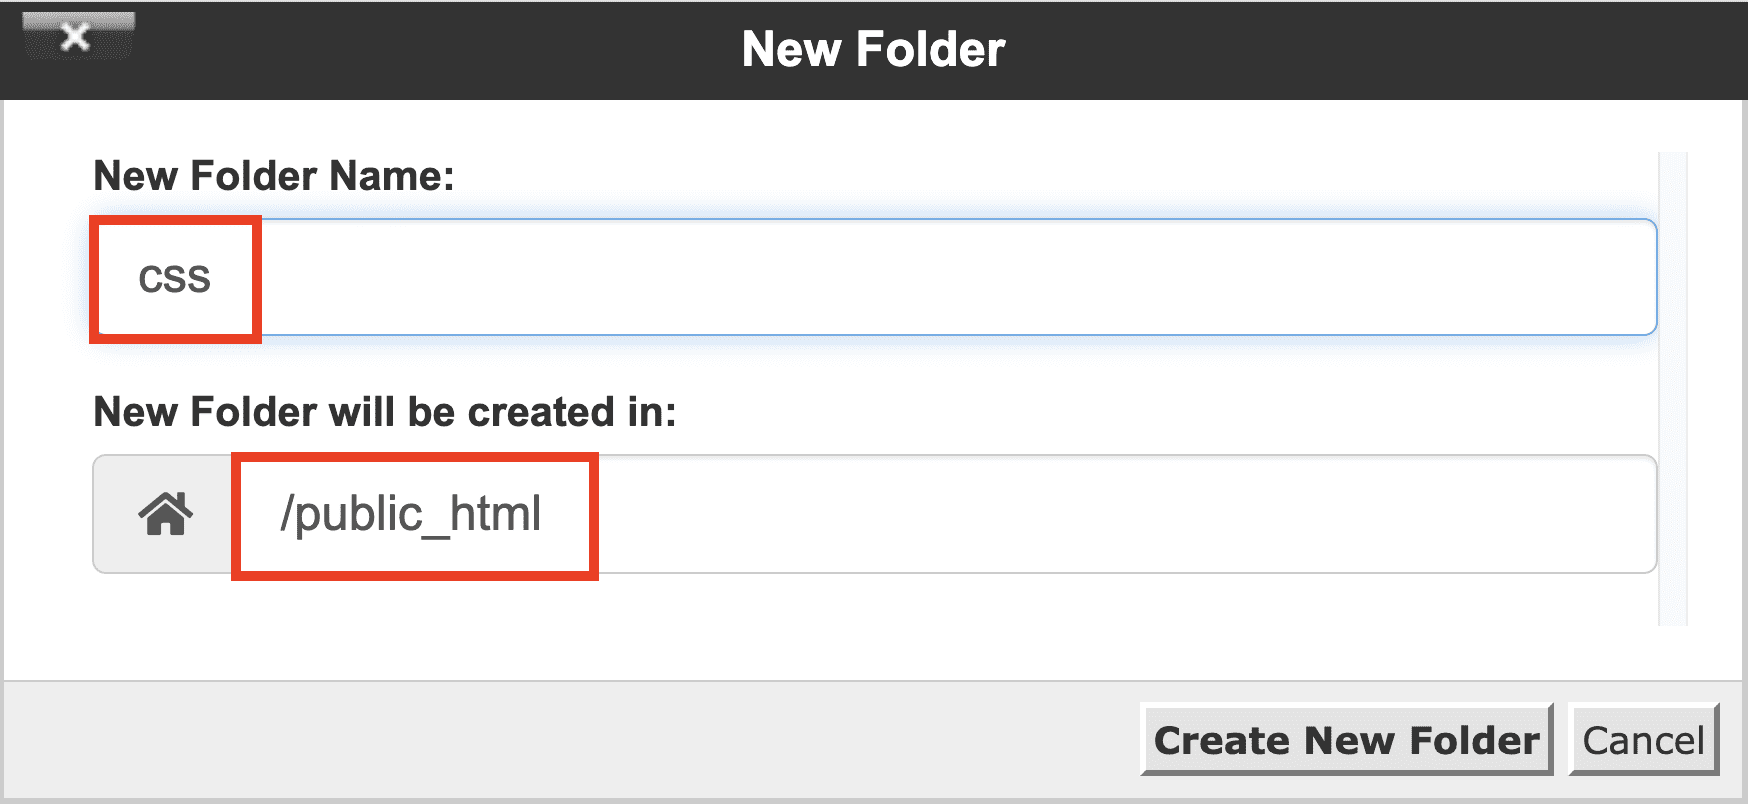
Step 6: Create a folder named CSS
Click +Folder and create a new folder with the name “CSS“.
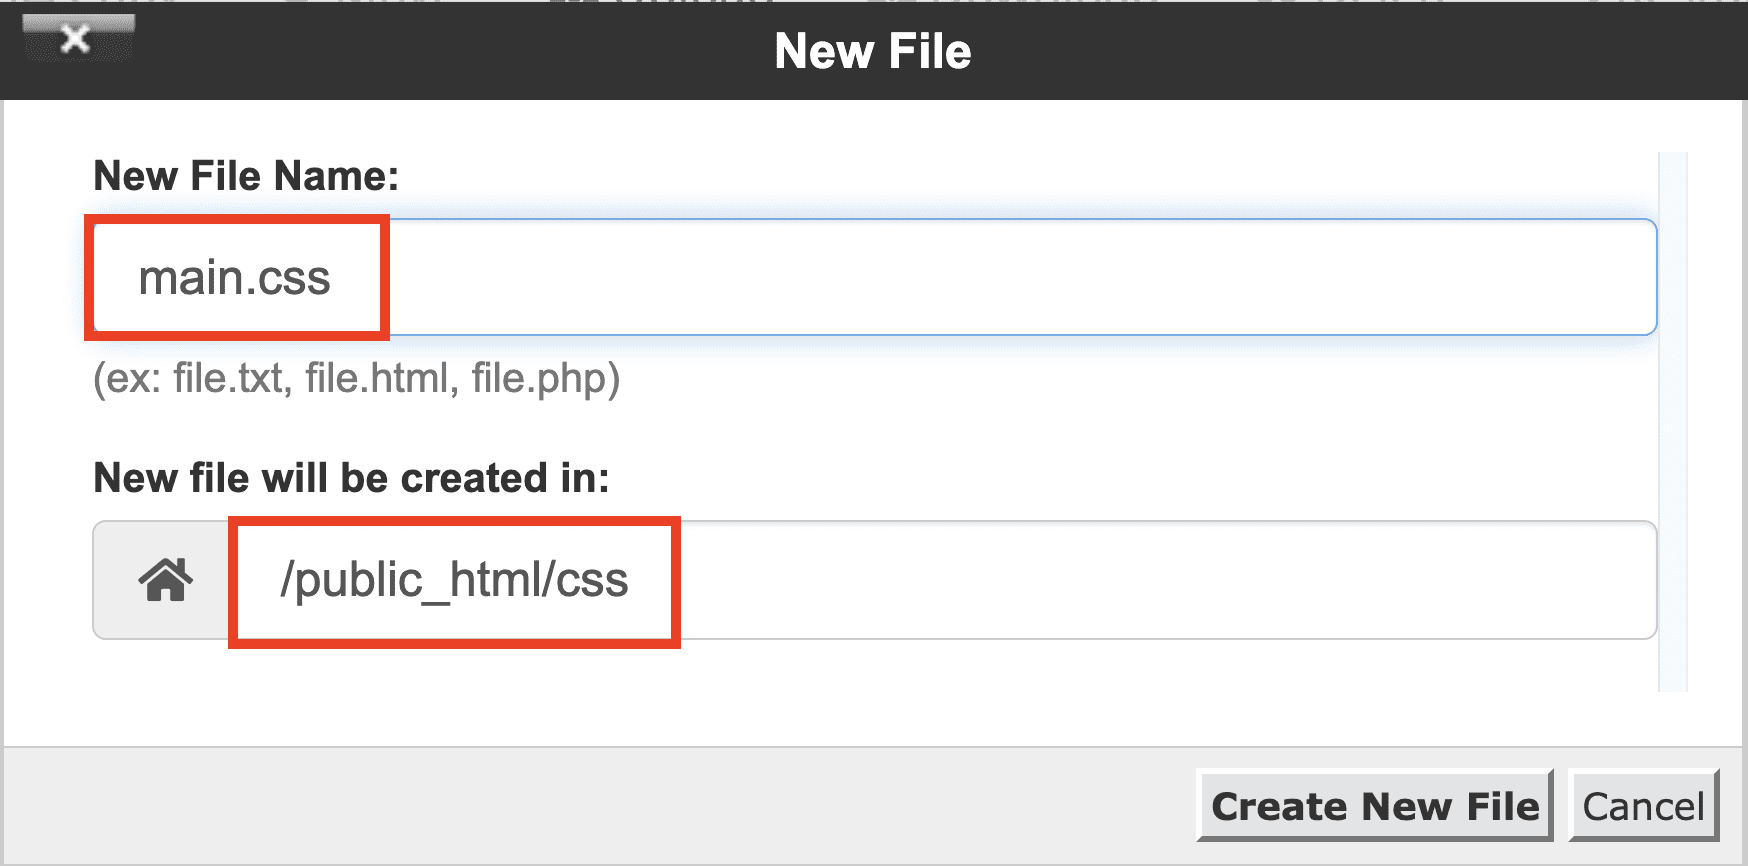
Step 7: Create a file named main.css
In the CSS folder, click +File to create a file with the name “main.css”.
Step 8: Copy the CSS code to the main.css file
Please copy the following CSS code and paste it inside the main.css file and save.
* {
box-sizing: border-box;
}
body {
font-size: 14px;
}
.v0_3 {
width: 100%;
height: 1024px;
background: rgba(236,245,240,1);
opacity: 1;
position: relative;
top: 0px;
left: 0px;
overflow: hidden;
}
.v4_4 {
width: 100%;
color: rgba(0,0,0,1);
position: absolute;
text-align: center;
top: 55px;
font-family: Roboto;
font-weight: Regular;
font-size: 195px;
opacity: 1;
}
.v4_5 {
width: 100%;
color: rgba(0,0,0,1);
position: absolute;
top: 294px;
text-align: center;
font-family: Roboto;
font-weight: Bold Italic;
font-size: 48px;
opacity: 1;
}
.v9_3 {
width: 630px;
height: 337px;
background: url(“../images/v9_3.png”);
background-repeat: no-repeat;
background-position: center center;
background-size: cover;
opacity: 1;
position: absolute;
top: 55%;
left: 50%;
transform: translate(-50%, -50%);
overflow: hidden;
}
.v7_7 {
width: 100%;
color: rgba(0,0,0,1);
position: absolute;
top: 800px;
font-family: Roboto;
font-weight: Bold Italic;
font-size: 48px;
opacity: 1;
text-align: center;
}
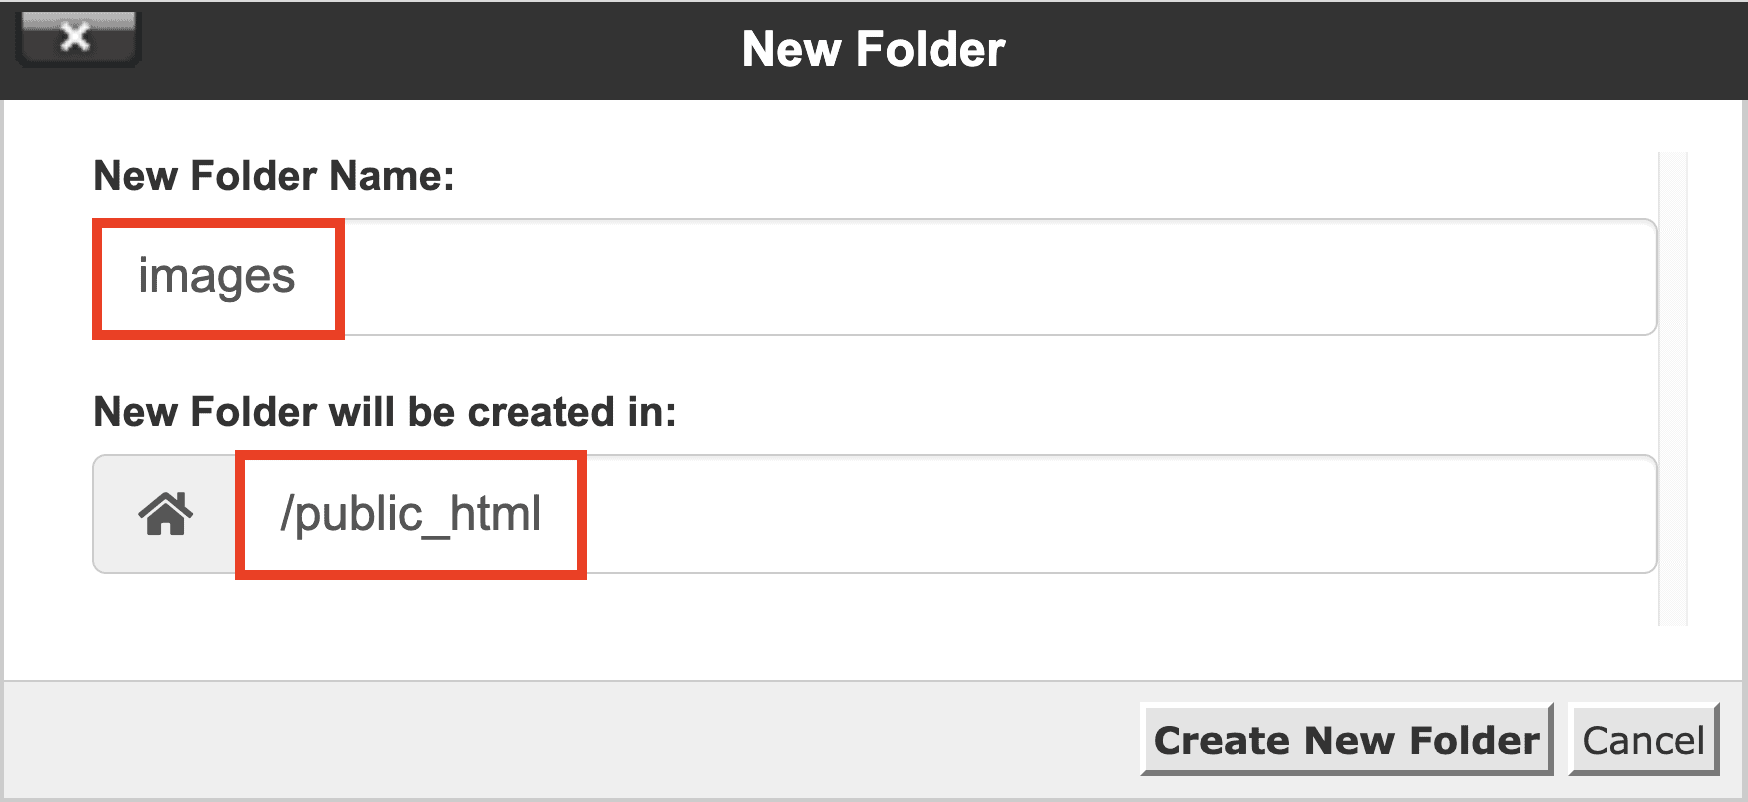
Step 9: Create a new folder named images
Create a new folder called “images”.
Step 10: Upload the background image and rename it
Upload any image of your choice inside the folder images or the image below and rename it to “v9_3.png”.

Step 11: Tell the server to use your 404 error page
Click on Settings >> tick Show Hidden Files >> click Save
Add the following line to your .htaccess file and save it.
ErrorDocument 404 http://example.com/404.html
Step 12: Use your web browser to test your error page.
If your web page is displaying incorrectly do a hard refresh on your browser.